GWT Material Designを使ってみる
GWT Material Designというものがあることに気がついたので、これを使ってみる。
Material Designとは何か?
まず、Material Designについてだが、これを検索しても、まともな説明は無い。つまり、Googleがこれを作り出したわけだが、検索してみても「なぜこれを作ったのか、どんな問題を解決したかったのか、何を目指しているのか」という解説は一切無いのである。
あるのは単に「使いこなす」だの、「語り尽くす」だの、「ここに注目」だのという解説、あるいは「デバイスが変わっても操作感に統一性をもたせられる」だのいう説明しかない。
相も変わらず上から与えられたものを単に解釈するだけしか、日本のギョーカイには存在しないことが感じられる。そういった姿勢しか無いのである。
とはいえ、とりあえずここでは設計思想を追求するのは面倒なのでやめておく。GWTで使えるMaterial DesignであるGWT Material Designの使い方を示していく。
とは言っても、単純な方法論としては、GWTにもともと備わっていたボタンやら何やらを置き換えるだけである。以下では、とりあえずこれを簡単にやってみる方法を示す。
サンプルの作成
まずはEclipseのGWTプラグインで自動作成されるサンプルを作る。これは、最新Eclipse(2018/1 Oxygen)でGWTサンプルを動かすまでに記述した。
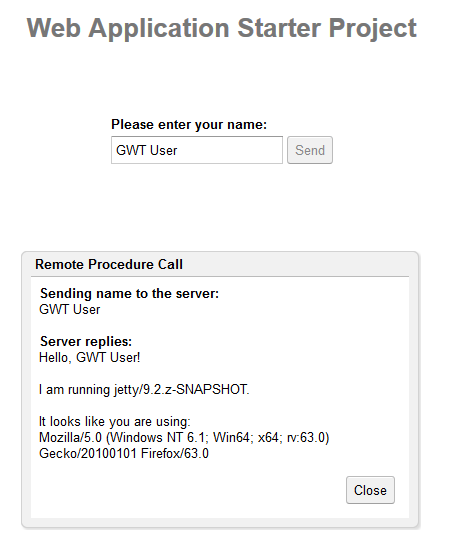
このサンプルを動作させると、以下の表示になる。
GWT Material Designライブラリを取り込む
ここではGradleを使う。build.gradleを作成し、「cleanEclipse eclipse」する。GWT 2.8.2を使用している。
apply plugin: 'java'
apply plugin: 'maven-publish'
apply plugin: 'eclipse'

repositories {
  mavenCentral()
}

sourceSets {
  main {
    java {
      srcDir 'src'
    }
    resources {
      srcDir 'src'
    }
  }
}

dependencies {
  compile group: 'com.github.gwtmaterialdesign', name: 'gwt-material', version: '2.1.1'
  compile group: 'com.google.gwt', name: 'gwt-servlet', version: '2.8.2'
  compile group: 'com.google.gwt', name: 'gwt-user', version: '2.8.2'
}

eclipse {
  project {
    natures 'org.eclipse.wst.common.project.facet.core.nature'
    buildCommand 'org.eclipse.wst.common.project.facet.core.builder'
    buildCommand 'com.gwtplugins.gdt.eclipse.core.webAppProjectValidator'
  }
  classpath {
     defaultOutputDir = file('war/WEB-INF/classes')
    downloadSources = true
  }
}
サンプルコードを変更する
htmlの修正
GWT Material Designを使うには、jqueryを取り込まねばならない。現時点での最新バージョンにしてみた。以下のように挿入する。
<html>
  <head>
    <script src="https://code.jquery.com/jquery-3.3.1.min.js"></script>
    <meta http-equiv="content-type" content="text/html; charset=UTF-8">
ちなみにjqueryを取り込まないと実行時に以下の警告が表示され、ブラウザがハングアップ状態になってしまう。
Warning: GWT Material is not providing JQuery. You must ensure JQuery is loaded manually or use one of the GwtMaterialWithJQuery modules, failing to do so will result in an endless resource loop. This message can be ignored if you are doing so already (message will not appear in production).
gwt.xmlの修正
Sample.gwt.xmlに以下を挿入する。
<inherits name='gwt.material.design.GwtMaterialDesign'/>
クライアントコードの修正
sample.client.Sampleのコードを以下のように修正する。単純にButtonをMaterialButtonに、TextBoxをMaterialTextBoxにしただけだ。ただし、MaterialTextBoxにはselectAll()メソッドが無いなので、とりあえず消しておく。
 public void onModuleLoad() {
    final MaterialButton sendButton = new MaterialButton("Send"); // <--
    final MaterialTextBox nameField = new MaterialTextBox(); // <--
    nameField.setText("GWT User");
    final Label errorLabel = new Label();

    // We can add style names to widgets
    sendButton.addStyleName("sendButton");

    // Add the nameField and sendButton to the RootPanel
    // Use RootPanel.get() to get the entire body element
    RootPanel.get("nameFieldContainer").add(nameField);
    RootPanel.get("sendButtonContainer").add(sendButton);
    RootPanel.get("errorLabelContainer").add(errorLabel);

    // Focus the cursor on the name field when the app loads
    nameField.setFocus(true);
    // nameField.selectAll(); このメソッドは無い。 <--
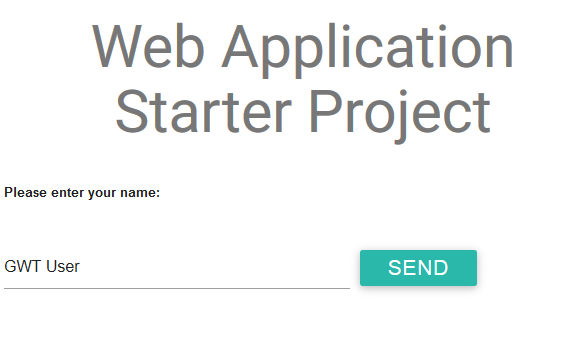
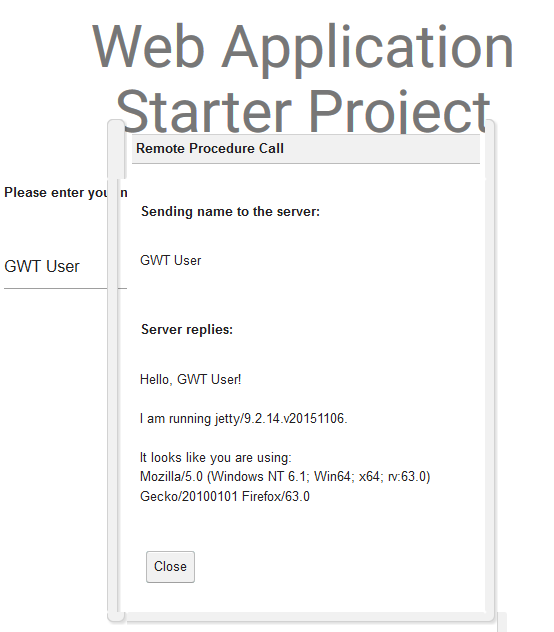
実行結果
実行してみると以下になる。かなりレイアウトが変更される。そして、応答ボックスはレイアウトが崩れているが、既存のGWTウィジェットとはスタイルが合わないせいだろう。