GWTで動的にスタイルシートを変更する
※以下の方法では結局「動的にスタイルシートを変更する」ということはできない。結局のところ、「ClientBindle/CssResourceの入門編」にしかならない。
一般にスタイルシートは、静的なファイルで構成され、一度決めてしまったら動的に変更することは無いと思われるが、これを行いたい。
まずは、どのような色合いが適切であるかを簡単に試してみたい。また、できればユーザの好みに合わせて変更したいのである。これをどうやればいいのか?
参考としたのは以下の記事だ。ただし、UI-Binderは一切使わないのでアレンジしてある。
今回も最新Eclipse(2018/1 Oxygen)でGWTサンプルを動かすまでで作成されるサンプルを使う。
単純な例
以下の改造を行う。
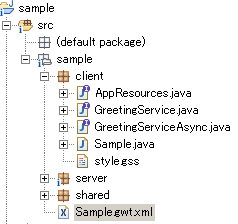
sample.clientにAppResources.javaファイルを追加
ackage sample.client;

import com.google.gwt.core.client.*;
import com.google.gwt.resources.client.*;

public interface AppResources extends ClientBundle {
  public static AppResources INSTANCE = GWT.create(AppResources.class);
  interface Style extends CssResource {
  }
  @Source("style.gss")
  Style style();
}
同じくstyle.gssファイルを追加
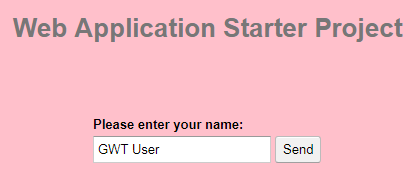
body { background-color: pink; }
Sample#onModuleLoad()に以下を追加。
  ...
  public void onModuleLoad() {
    AppResources.INSTANCE.style().ensureInjected();
    ....
Sample.gwt.xmlに以下を追加
  ...
  <add-linker name="xsiframe"/>
  <set-configuration-property name="CssResource.enableGss" value="true"/>
</module>
この状態で実行すると以下の表示になる。
classを導入する
ここでいうclassとはCSSのclassのことだ。
style.gssを以下にする。
body {
  background-color: pink;
}

.my_first_class {
    background: red;
}
AppResourcesを以下にする。
import com.google.gwt.core.client.*;
import com.google.gwt.resources.client.*;

public interface AppResources extends ClientBundle {
  public static AppResources INSTANCE = GWT.create(AppResources.class);
  interface Style extends CssResource {
    String my_first_class();

  }
  @Source("style.gss")
  Style style();
}
Sample#onModuleLoad()を以下に変更する。
public void onModuleLoad() {
AppResources.INSTANCE.style().ensureInjected();
final Button sendButton = new Button("Send");
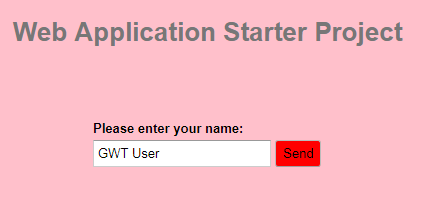
sendButton.getElement().addClassName(AppResources.INSTANCE.style().my_first_class());
final TextBox nameField = new TextBox();
この結果は以下だ。
class名にハイフンを使いたい場合
前項でのclass名は、my_first_classとなっており、CSSで良く用いられるmy-first-classではない。この理由はJavaの識別子ではハイフンが許されないからだ。ハイフンを使うには以下のようにする。
style.gss
body {
  background-color: pink;
}

.my-first-class { /* 名称変更 */
    background: red;
}
AppResources
package sample.client;

import com.google.gwt.core.client.*;
import com.google.gwt.resources.client.*;

public interface AppResources extends ClientBundle {
  public static AppResources INSTANCE = GWT.create(AppResources.class);
  interface Style extends CssResource {
    @ClassName("my-first-class")  // アノテーションで名称を指定
    String myFirstClass(); // メソッド名は何でもよい。このメソッド呼び出し箇所も変更する
  }
  @Source("style.gss")
  Style style();
}
カラーマネジメント
ある一つのテーマカラーを決め、それをボタンでもパネルでも使いたい。通常これを行うには、スタイルシートで何度も同じコードを書くが、しかし色を変えたい場合にはすべてを置換しないといけない。
ある一つの場所だけで色を定義しておき、それを柄回したいのである。もちろん「CSS変数」というものがあるようだが、GWTでは全く別の方法で解決する。
Colorsクラスを作成する。
package sample.client;

public class Colors {
  public static String getPrimary() { return "#2054e8"; }
  public static String getBackground() { return "#A3B399"; }
}
style.gssを書き換える。
@def C_PRIMARY        eval("sample.client.Colors.getPrimary()");
@def C_BACKGROUND     eval("sample.client.Colors.getBackground()");

body {
  background-color: C_BACKGROUND;
}

.my-first-class {
    background: C_PRIMARY;
}
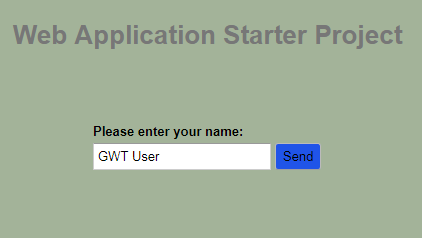
すると結果は以下になる。
イメージを使う方法
適当な画像を用意して、これをbackimage.pngとする。
AppResources
package sample.client;

import com.google.gwt.core.client.*;
import com.google.gwt.resources.client.*;

public interface AppResources extends ClientBundle {
  public static AppResources INSTANCE = GWT.create(AppResources.class);
  interface Style extends CssResource {
    @ClassName("my-first-class")
    String myFirstClass();
  }
  @Source("style.gss")
  Style style();

  @Source("backimage.png")
  ImageResource backimage();
}
style.gss
@def C_PRIMARY eval("sample.client.Colors.getPrimary()");
@def C_BACKGROUND eval("sample.client.Colors.getBackground()");
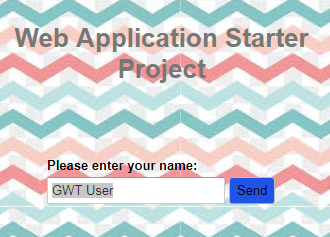
@def BACKIMAGE resourceUrl("backimage");
body {
background: BACKIMAGE;
}
.my-first-class {
background: C_PRIMARY;
}
以下の表示になる。